Tuesday, March 29, 2011

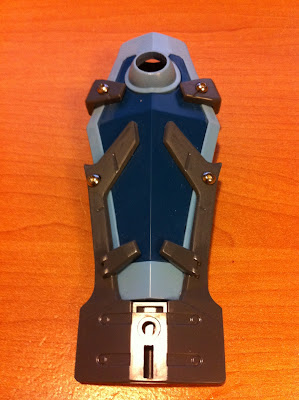
Real Grade Aile Strike Gundam Pictures!

So I found these scouring the inter-webs just about 15 mins ago. I apologize for not posting in quite some time, Ive been super bust. I just recently got a new job, finally putting my college degree to good use. Anyways less talky more pictures...


Looks like a whole mess of Win to me, I for one cannot wait for this kit to come out. Just a few more weeks and I can see if I can score one off of Ebay, being thats the only place ill probably be able to find it that soon. If not I can always wait until May when most of the US distributors get their....hmmm

Anyways, I'm going to try and post back this weekend with a bunch of updates. I finally finished my spray booth, I finished all the decals and sprayed the flat coat on my RG Zaku II and I have an update on the Color Scheme for the Gouf. Lets just say that if I can pull off this color scheme, my Gouf is going to win me quite a few medals. I also just finished painting a group of War Machine figures, six to be exact and they are looking quite awesome as well.

Hopefully I can get some time to post and do some painting in the next couple of days. Keep checking back for updates. 

Sunday, March 13, 2011

Tutorial: Water Slide Decals on RG Zaku II

So a few days ago I got the water slide decals I have been waiting on for my Real Grade Zaku II. I must admit I was a bit skeptical being that the stickers were really tiny and I had no idea how they would translate into water slides. After actually using them and completely decaling the RG Zaku I couldn't be happier with the way they worked. While it was a bit more tedious then say a Master Grade the extra work sure was worth it in the end.

So how does one actually apply water slide decals? Well I'm glad you asked because I'm going to be doing a short tutorial today on how to use and place water slide decals. First and foremost you need your materials; Decal Sheet, Warm Water in a Shallow Container, Toothpick, Que-Tips, Tweezers, Paper Towel, Small Paint Brush, Exact-o Knife or Scissors, and Micro Sol. Second most and a tip that will save you much time is to make sure all the pieces that you are applying decals to are top coated with a clear gloss. This will give the decal a smooth surface to slide on and stick to when applying the decals.


So the first thing after you have all your materials organized to do is to plan out where your decals are going to go. This is probably the most important step because you don't want to place a decal and realizes you wanted it somewhere else. Once the decal is stuck down it becomes very hard to remove it and replace it with out ruining it. As you can see I had already placed one decal when I took this picture. I like the scheme Bandai laid out in the construction guide so ill be using that. Once I figured out which decal was going on next, I used my Exact-o to cut it out.


Here you can get an idea of how small these decals are, that is one of the bigger decals on the sheet too! Now that the decal is cut you should place it where you plan to put it, just to make sure that you like the way it looks. As I said before I'm just going with the way Bandai has theirs set up so I already have an idea of what it was going to look like. After you are happy with the placement it is time to soak the decal. Place the decal into your shallow container of water for around 5-7 seconds. You don't want to leave the decal soaking for too long because the glue thats used to adhere the decal will devolve and the decal will no longer stick.


After a good 5-7 seconds remove the decal from the water and place it on a paper towel for a few seconds just to allow all the excess water to be soaked up. Too much water will make the decal harder to place. Let it sit for a second or two then carefully place the decal onto the model. Tweezer come in handy for this step especially reverse action tweezer (unfortunately I don't own any, I just use my fingers or the exact-o to pick up the decal and place it).


There it is, the decal on the model ready to be slid off. Now this is where a lot of people get confused, how exactly does the decal go from the paper to the model? Well if you have a good set of decals you can look very closely to them and you'll notice that the decals have a clear film around them, this is also part of the decal everything else on the sheet is the glue that holds the decal to the backing. The glue softens with water allowing you to slide the decal off the backing (sometimes you'll notice if your hands are a bit moist they will stick to the decal sheet so you should be careful when handling the decal sheet). So in order to slide off the decal I use a dulled down toothpick, you don't want it to be sharp it may damage the decal. I gently push at the decal with the toothpick until it begins to slide then I push the decal right off the backing onto the model.


In this picture you'll notice that the decal is half on the paper and half off, I did this to demonstrate that the decal will slide off the backing. Once the decal is off the backing entirely you can begin to position it where you want it. Great thing about water slide decals is you have a bit of time to position and reposition the decal before the glue sets. Once you have the decal where you like it take your Que-tip or paper towel and dab at the decal to remove any excess water. It is quite easy to accidentally move the decal so be careful not to in the dabbing process. If you do however move the decal in this process it isn't too hard to go back re-wet the decal and position it back (I use the paint bush to brush on more water if this happens). Once the decal is dry it should be stuck to the model. I usually let the decal sit for a bit before going to the next step.


Woot, decal is stuck down! Most decal glue is cheap and will stop working after a while. Its important to set the decals so they don't fall off (decal setter will melt the decal into the plastic). Micro Sol is a decal setter and can be obtained at any hobby shop for no more than three dollars for a bottle that will last you the rest of your life.


With a soft new brush (you don't want to use this brush for anything else) apply a thin coat of Micro Sol to the decal. Make sure to only brush it once or twice, excessive brushing may lift up the decal and break it. Double check to make sure there are no hairs or dust on the decal after you brushed it, you don't want those setting into the decal, it becomes almost impossible to get them out once the setter has dried. Then let the piece sit for an hour while the Micro Sol does its thing. You want it to fully evaporate on its own, touching it may deform the decal. You may notice the decal begin to wrinkle, don't worry this happens it will eventually flatten back out and smooth out.


And there you have it, applying water slide decals while tedious is far worth the effort. I can now put a clear coat over these decals and you wont even be able to tell that they are decals, they will appear to be painted on.

Well thats it for my little tutorial, keep checking back. I will be reviewing the Iwata HP-CS Eclipse sometime next week as well as putting up pictures of the spray booth I built along with plans and material list.

Wednesday, March 9, 2011

Real Grade RX-78-2 Unboxing

So like I said yesterday, I'm going to do a quick unboxing of the Real Grade RX-78-2 Kit I picked up in New York the other day at the Elizabeth Center Mall on Canal Street. First off the box!

Real Grade RX-78-2 Box

Very nice Gloss box just like the Zaku II Real Grade, lots of details and pictures all around and the front box art is just awesome. So when you crack the box you are going to get like any standard Gundam the Plastic, The Decals, and Construction Guide. Like I came to expect from the Zaku there are many plastic runners to this kit (Ten in all) and in many colors (white, two shades of grey, two shades of red, two shades of blue, yellow, and black). So lots of colors to play around with, maybe a bit overwhelming if you decide to paint it.

Real Grade RX-78-2 Stickers

Stickers are the normal super thin stickers that come with almost all the new Gundam kits. This sheet also has the special Real Grade shiny foil sticker, a nice plus for those who don't paint and want great detail. I really have no use for the stickers, Ill end up buying the water slides and painting on the metallic detail like I did on my RG Zaku II.

Real Grade RX-78-2: A Plate

Heres the A Plate with one of the shades of Grey the Yellow and the Clear Pieces; including the pink beam sabers, this is probably one of the larger Plates in the kit as is with any A Plate. As with most Gundam kits this plate is made of Polystyrene.

Real Grade RX-78-2: B Plate (Advanced MS Plate)

The B Plate is the special MS Plate that has the entire inner frame already assembled. It is molded much like how the hands of most Perfect Grades are with the joints already linked on the runner. This plate is a feat to how far plastic models have come in the last couple of years. I don't know how they exactly do it but the plate is made up of two different types of plastics ABS Plastic and Polypropylene (which is a softer plastic much like what Poly Caps are molded out of. You'll get the Master Grade 2.0 like Hands (along with the fist hands), the Legs, Waist, Torso, Arms and Feet all on this one runner!

Real Grade RX-78-2: C Plate

The C Plate is also one of the larger plates, it has both Reds, Both Blues and a Grey on it and is also made of Polystyrene. There is a lot of detail in these pieces, much like the last Real Grade I made. The Panel Lining on the sheild looks great.

Real Grade RX-78-2: D1 Plate

Real Grade RX-78-2: D2 Plate

 D1 and D2 are the Pure White Plates (PS), many pieces here and they are all so tiny.

Real Grade RX-78-2: E1,E2 Plate

E1 and E2 are the slightly off White shades of Grey (PS) and as with the rest of the the pieces so far there is a ton of detail packed into these tiny, tiny pieces.

Real Grade RX-78-2: H,F Plate

Real Grade RX-78-2: G Plate

The last three runners F,G (PS) and H (ABS) are the black runners with the exception of the F Plate. The F Plate is slightly lighter and has a tinge of Green in it, that adds to my color list.

The construction guide is very well illustrated and the use of red to highlight important parts is a great addition that I welcome on any new model construction guide. The center has some great photos of a completed non-painted figure in various poses along with the color guide and other information I cannot read. The last page features a fully colored diagram to help apply the decals.

I'm looking forward to building and painting this kit, after I finish the kits I am currently working on that is. Keep checking back for updates and other new and I will keep you guys posted!

Tuesday, March 8, 2011

News From a Distant Land

New York was a fun trip, it was great to hang out with my buddy Lou as I rarely get to see him because of our schedules. I woke at 7, was on the train to meet up with him by 10 and was in the city by 12. As we got off at Grand Central we decided a quick trip to MoMA was in order so we stopped there for a few hours and took in the beautiful collection of art that they have. My personal favorites will always be the more classical pieces from the Impressionistic era such as Cezanne, Van Gogh, Monet, Surat and of course some of the other big names such as Warhol, Dali Duchamp and Mondrian.


Van Gogh's Starry Night

Cezanne

Monet's Waterlilies

Absolutely a great way to spend the early afternoon; having gone to school for art education I got a chance to show off my teaching abilities to my friend and give him some deeper insight on some of the art and artists.

After MoMA we took the Green track onto Canal Street  to get some Dim Sum for lunch and then we headed to the main attraction, the Elizabeth Center Mall.

Elizabeth Center Mall: Google Maps

Thats how it looked on my iPhone and heres what the entrance looks like. Honestly its a bit hard to spot if you don't know what the entrance looks like.

Elizabeth Center Mall Store Front

Once inside there is a plethora of Chinese/Japaneses goods but the stuff I was looking for is on the lower level. Down the escalator and around the comer we went until we found the store...


Elizabeth Center Mall Model Shop

What you see there is a shot of the outside of the store; thats pretty much the width of the entire store. From what I've seen online the store looked much bigger than it actually was. Unfortunately the owner would not allow me to take pictures in the store so I took a quick look around and bought what I came for. For a small store he sure did have a bunch of kits packed in there; I saw most of the newer Perfect Grades as well as most of the newer Master Grade kits. He also had a handful of new SD kits, HG kits, Revoltech Figures, and the new Rodimus Prime Masterpiece Transformer. I didn't take as good of a look as I wanted being that the store was so small and there were so many people wanting to go in and out of it. I did however get what I came for and that is.....

Real Grade RX-78-2 Box

The Real Grade RX-78-2 Gundam. I've wanted this kit since building the newer Zaku II Real Grade and I could not pass up the chance to get it in person. That brings me to something I found surprising, the prices at this particular shop were not bad, I only paid a few dollars more than the Yen conversion. The kit retails for 2800 Yen which is about 34.00 USD and I paid 35 dollars! I was a happy camper to say the least.

After our adventure at the model shop in the Elizabeth Center Mall we took a run across the street to another Toy/Model/Card shop. Their prices were a bit more expensive yet they had a much larger selection of Gundam and other Model kits but since I had already gotten what I had came for, we just took a quick look and headed on our way.

After the shops we did some street haggling, grabbed some desert at a Chinese bakery and headed back to the station. Over all it was a great day in the city and I hope to do it again soon (most likely when I can get my hands on the Real Grade Strike Gundam.

As far as my Gundam progress goes I got the water slide decals for the PG Strike in the mail today from eBay so I may be working on that soon, maybe put up a tutorial on how I do that. I also started cleaning up the waist armor pieces of the PG Strike for paint so Ill be sure to take some pictures when I do that. Like I said the other day I finished the Rifle for the PG Strike so I will be painting that soon as well and I just finished modding the shield of the Gouf Custom too so thats just about ready to be painted too! Lots of stuff to paint very little time to actually do it all.

Strike Gundam's Beam Rifle

Had to fill in the seam lines on the gun which was kinda a pain but it came out looking good. Only thing I didn't like about this gun was the little pieces you put in the front below the barrel. It looked to be some sort of grenade with some great detail but once you put it in it doesn't come out. I almost broke it trying to get it back out. Oh well...

Gouf Custom's Shield

The Gatling Gun for the shield already has the metal barrels modded which I did a few weeks ago, all I did was drill out some holes to put some hex screws in the shield.

I'll be posting an unboxing of the Real Grade RX-78-2 soon so check back for updates!


Sunday, March 6, 2011

New York Bound

Tomorrow I will be heading to New York for the day with a good friend of mine. We'll probably end up going to MoMA and some other museums while we are down there and grab lunch as well. My friend doesn't know it yet but I have a secret agenda to head to the Elizabeth Mall on Canal Street to visit a store that is a secret to most Gundam Fans. The store specializes in all sorts of imported Chinese/Japaneses toys and models such as Gundam so I will defiantly be posting tomorrow to let you guys know the scoop on that store and how good the deals are.

In other news, I got my tax return and with some of the money I will be buying a new Air Brush and a few model kits I've had my eye on.

Iwata HP-CS Eclipse

Thats what I've been looking at for the past few days now the Iwata HP-CS Eclipse and its actually what I've wanted for quite some time now. I had to make the choice between the Eclipse and the DevilBiss Dagr and all signs are pointing to the Eclipse.

Hopefully tomorrow I can sneak some photos of this place in for the blog. I know the shop owners don't like it very much when you take pictures but for you guys I will try.

Saturday, March 5, 2011

Transformers....hmmm

So tonight I finally got around to watching Transformers the Movie. I have no idea why I waited so long, I mean it was an awesome movie. Leave it to Michale Bay to make it really melt your face off. So after the movie I decided to purged the inter-webs to see if I could find any Transformer model kits, to my dismay not many exist. This is probably because of companies soaking up the rights and such. Or maybe its just really hard to make a transforming model kit. This does bring me to something I have found, a kit that is coming out this year. The kit seems to have a prebuilt inner frame and the builder has to put on the outer frame (Much like the Gundam Real Grade kits I love so much). Seems like it could be interesting, if it can transform I may pass out.

Takara Tomy Duel Model Kit Preview 1

Here are some of the released previews of the kit, from what I've read the kit is set to release in June of 2011.

Takara Tomy Duel Model Kit Preview 2

Takara Tomy Duel Model Kit Preview 3

Can't wait to see more from this, I mean if you though I was just a Gundam nerd you were wrong. I just love robots in general. Would that make me a robot nerd? Hmmm.

Anyways I know I haven't posted in a while, I am still slowly working on my kits; The Perfect Grade Aile Strike and the Master Grade Gouf Custom. Today I put the gloss coat on the white leg armor parts I painted last week and I also ordered the decals for the Strike off of eBay yesterday. I still need to get the decals for the striker pack and the SkyGrasper, they are a bit challenging to find.

Perfect Grade Stike Gundam's Water Slide Decals

You may be asking yourself; Wow you really are taking your sweet time with these builds Neil! My answer to that is; You are right and I have only one person (or thing) to blame.


Sack Boy from Little Big Planet

Little Big Planet 2 is probably the most fun I've had playing a video game since Little Big Planet 1. I won't go too far into it but most of my free time has been devoted to that little guy. I mean how could you resist?

Anyways but I'll post more in the morning, I took some pictures of the work I've done with the Perfect Grade and the modifications I've done to the Gouf. Hopefully tomorrow I can do some more prep to the waist pieces so I can start painting those. Until then in the words of Charlie Sheen, May you always win.